Wednesday, July 16, 2014

Weekly Deals... July 15


Here is this weeks trouble makers.... 

Gorgeous Grunge Stamp Camp $$ is due Fri, July 25.  

Buy 3 get 1 FREE is until the end of July.

Half off your first 2 months of Paper Pumpkin for new subscribers.

New items on the Clearance Rack.

Have a Great day getting Crafty!!  

Tuesday, July 8, 2014

Weekly Deals... July 8


Gold Fancy Designer Vellum Foil Sweet Shop Kit -- Digital Download Artisan Label Punch Silver 1/8 Ribbon Smoky Slate 3/4 Chevron Ribbon Retro Fresh This and That JournalRetro Fresh This and That Washi Tape 

How is this for trouble causing??
Have you seen that vellum paper?? Check out this Mother's Day post... 
 and I know there are still those that are not sure about the Washi tape  THING..
Check out this Facebook post.... 
Any questions let me know!!

Have a Great day getting Crafty!!

Saturday, July 5, 2014

July '14

Another Stamp Camp card today...


Don't you just love this saying and I have to be honest...
I bought A Dozen Thoughts just because of this stamp.  Silly, right?? NO WAY!!
The rest of the set is AMAZING too!

 Yes, this is a slightly off center gate card. 
Our inside has just three flowers decorated with Candy Dots.

The 'just because' side is slightly wider then the Back to Black DSP side.
Yes, that was planned for more room to secure the phrase.


Here is some news!! 
The date for the next Stamp Set Stamp Camp has been set.  What is that you ask?? This is when a stamp set and 5 projects get to all go home with you!!

What is the stamp set you ask?? Gorgeous Grunge.

Here are the basics:
Dates - Sun, Aug 3 or Mon, Aug 4 both at noon central time.
Cost - Wood mount $30, Clear mount $23 or if you have the set already $15. The signup ends on Fri, July 25.  This is so I can have all the stamps here on time!!

Any questions contact me!!

Have a Great day getting Crafty!!


Friday, July 4, 2014

July 4, 2014

Happy Independence Day!!

 Please remember the people that made our Independence possible. 
From hundreds of years ago to present.

Have a safe and happy holiday!
 

Thursday, July 3, 2014

July '14


So you want to learn how I made that ribbon flower...
at the bottom of this post will be your supply list. 
As always ANY questions let me know!!

 First you will need two pieced of ribbon.  I used a 15 inch piece of both, the Burlap ribbon and Chevron ribbon.  

Moving to the sewing machine, I sewed both together.


Using a larger needle and the Linen Thread you want to weave the needle through one side of the ribbon. The paper snips are holding up the needle. 


Once through the whole side, just scrunch the Linen thread so that is starts to look like the above picture.  Note the needle is still there, don't poke yourself.
The more you pull it the more it will look like above.. 
looks like an 80's "scrunchie", haha.
You do not want to tie it just yet... be patient!
Using a Jumbo sticky round and your "scrunchie" you start with the small section or the middle and manipulate it how you want it... the easiest way to keep it where you want, use the sticky round.
Trimming the excess it should look like this. 
Here is where I tied the linen thread, just a knot.

And there you go.. a ribbon flower!!
I would love to see what you end up with.. send me a picture on Facebook!!
Have you liked Whispers In Ink on Facebook??
Join us!! and Share your photos there too!!

Have a Great day getting Crafty!!
 
Supplies:
1 1/4 Burlap Ribbon 132140 $7.95 
3/4 Chevron Ribbon Pear Pizzazz 130011 $8.95
Linen Thread 104199 $4.50 
Jumbo Sticky Rounds, 127852 $4.95 


Wednesday, July 2, 2014

It Started with...

Reminder of yesterdays post...
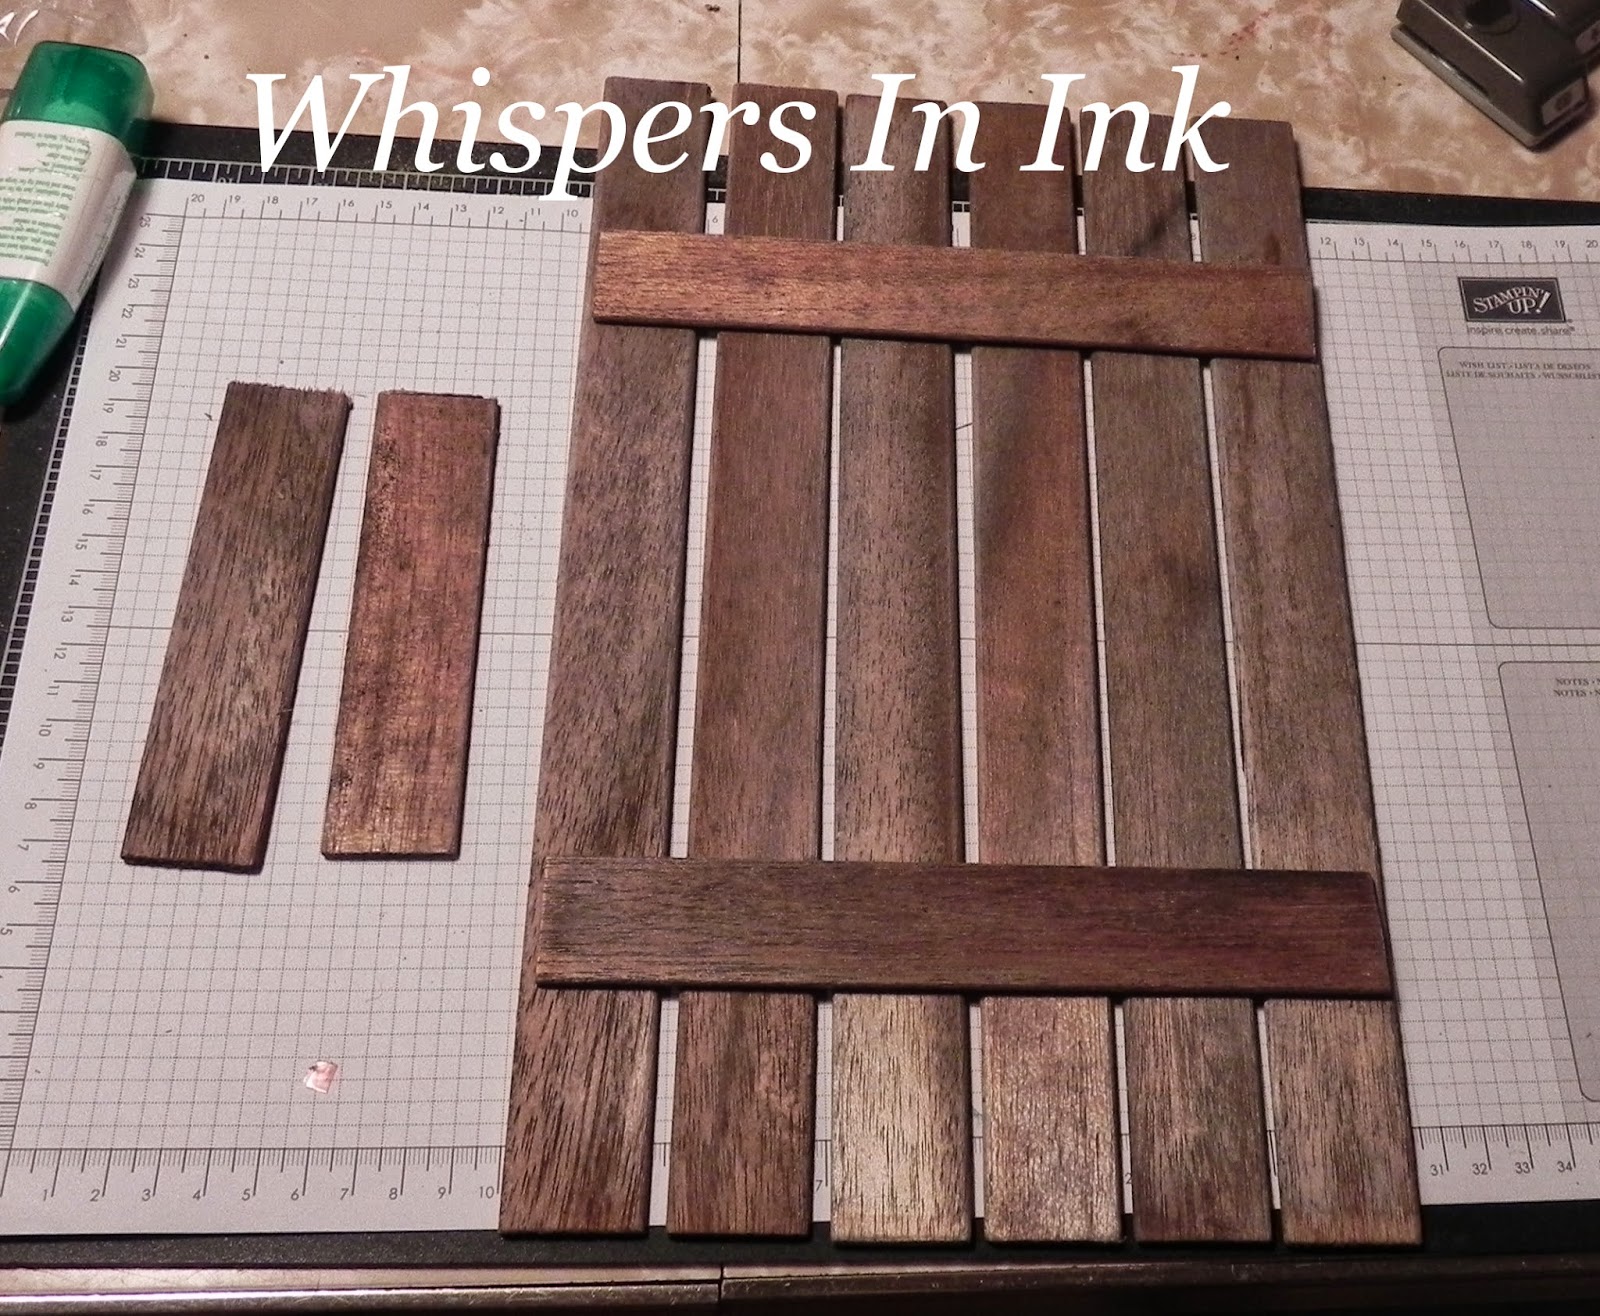
So, what are these you ask... Those are slats from a louvered bifold door.
Yes, I love bifolds for the height they offer. This one actually came apart, I saved the slats knowing that I could come up with SOMETHING to do with them...

While shopping with my wonderful Hubby, we saw this kinda cool picket fence picture holder and this is where I started thinking!! 
You NEVER know where your inspiration will come from.

Here is how it started!!

Using the Tombow Multipurpose Glue, which by the way is not the best adhesive for this project, but all I had at the time... the hot glue gun didn't work either.  Which now you see where my problem came in on yesterday's post.  My Hubby suggested a multipurpose epoxy, but none at the house, doesn't it figure, GEEZZ.
Anyway, all the slats were the same length, using a box cutter it was easy to "trim" the two vertical pieces to the size needed.


 Paper, Ribbon, Linen Thread and half of a Doily.

This Stamp set, Feel Goods, is FULL of amazing phrases. This one is one of my favorites.
Yes, I did "dirty" up the edges of both papers here.


This comes together and just adds, I think, to the rustic look of my 'fence' section.


I am sorry, I forgot that the Bigz Butterfly die retired until I starting putting together my post. 
Really wanting to use the metal, and not sure about punching it out, I left it.  

Decorative Dots Embossing folder is how those polka dots got on there, YES you can emboss metal, so long as it is thin.


Pleased with how the 'flower' turned out, I will show you tomorrow step by step how it all was put together.


Ready for the whole thing?? 
This could be an even longer post, if I showed you all the steps of the flower.


A few flowers with Rhinestones and a few others from glitter paper.. and those just add the pretties.

See you tomorrow with the flower post and
Have a Great day getting Crafty!!

Tuesday, July 1, 2014

It started with...

Due some technical trouble with adhesive today's post will be postponed, I am sorry!!

With as crazy as work has been, I was having inspirational difficulties, too.

Here is a sneaky peek though...


Any guesses to what those are??

No idea?? Well, you will have to wait until tomorrow!!
(giggle)

Have a Great day getting Crafty!!