Showing posts with label Glimmer paper. Show all posts

Thursday, November 6, 2014

Stamp a Stack

Today is the last day to sign up for...
 
Pick your Stamp - Stamp-a-Stack.
 
Here is how it goes... You pick one card and you can make 10,
or pick 2 and you will make 5 of each.
All for the total of $25.00.
 
Here are your five choices, I hope I did not make it an easy choice!!
 
 
 The stamp sets used are:
Ornamental Pine
Endless Wishes
Wondrous Wreath and Framelits
Bearing Gifts
Festival of Trees and Punch
 
Not a good enough picture....


for those of you that know me... I share all my cards with my son, Trevor even before you guys get to see them, sooo these are phone pictures, but they work.

Above is the Ornamental Pine easel card.  Simple and pretty.


 Endless Wishes is next, using the Trim the Tree paper stack and snowflake charm.


The next one is Wondrous Wreath using the matching framelits.
I do LOVE this screen door and look for ANY excuse to use it!!  
This one was Trevor's favorite until ...... Festival of Trees what completed


Bearing Gifts is our Forth idea.... adding All is Calm DSP and matching washi tape.


Last one is the one I had a difficult time putting together.  
Festival of Trees and the matching punch. Can you tell what other two Stamp sets are used on this??
Trevor's new Favorite.

Contact me TODAY!! to sign up for class.  
Pick which day Sat, Nov 15 or Sun, Nov 16 both noon central time.
I can not wait to see you again!!
 
Have a Great day getting Crafty!!!

Wednesday, July 2, 2014

It Started with...

Reminder of yesterdays post...
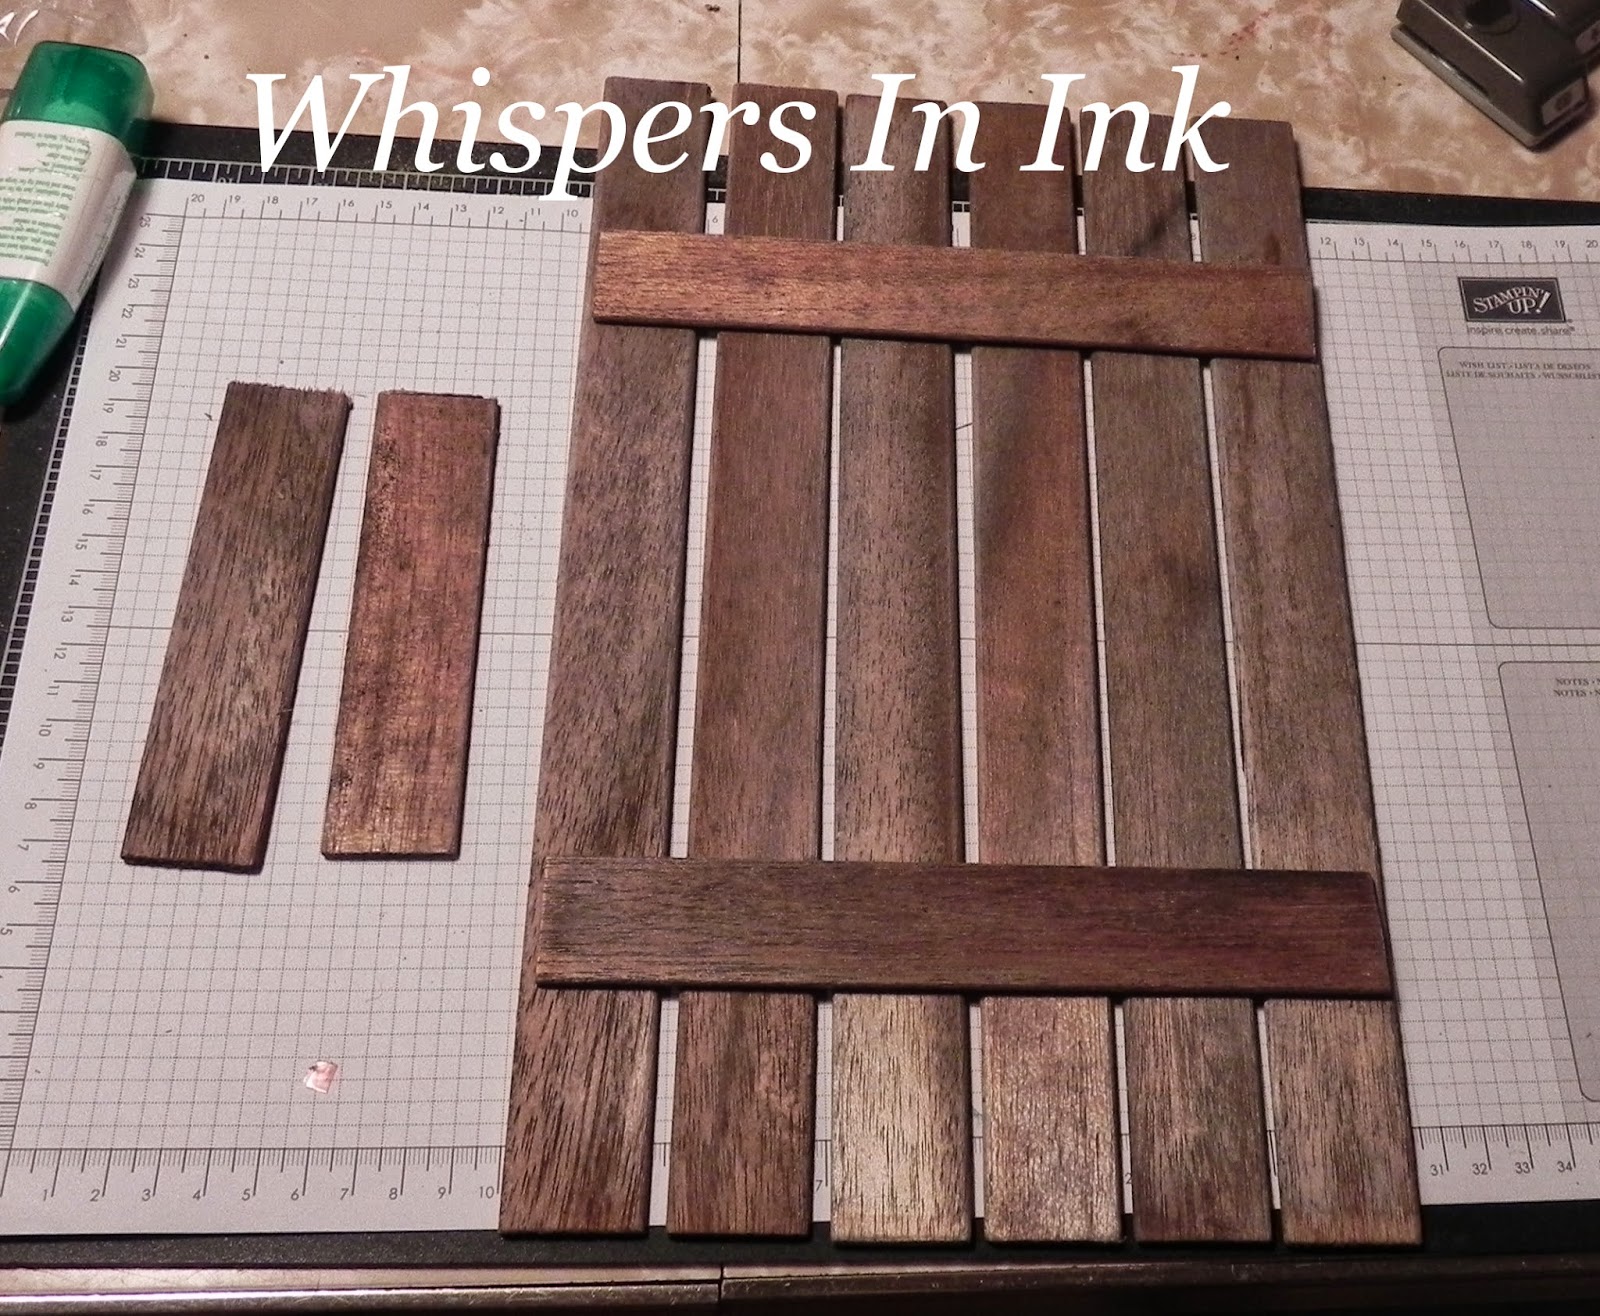
So, what are these you ask... Those are slats from a louvered bifold door.
Yes, I love bifolds for the height they offer. This one actually came apart, I saved the slats knowing that I could come up with SOMETHING to do with them...

While shopping with my wonderful Hubby, we saw this kinda cool picket fence picture holder and this is where I started thinking!! 
You NEVER know where your inspiration will come from.

Here is how it started!!

Using the Tombow Multipurpose Glue, which by the way is not the best adhesive for this project, but all I had at the time... the hot glue gun didn't work either.  Which now you see where my problem came in on yesterday's post.  My Hubby suggested a multipurpose epoxy, but none at the house, doesn't it figure, GEEZZ.
Anyway, all the slats were the same length, using a box cutter it was easy to "trim" the two vertical pieces to the size needed.


 Paper, Ribbon, Linen Thread and half of a Doily.

This Stamp set, Feel Goods, is FULL of amazing phrases. This one is one of my favorites.
Yes, I did "dirty" up the edges of both papers here.


This comes together and just adds, I think, to the rustic look of my 'fence' section.


I am sorry, I forgot that the Bigz Butterfly die retired until I starting putting together my post. 
Really wanting to use the metal, and not sure about punching it out, I left it.  

Decorative Dots Embossing folder is how those polka dots got on there, YES you can emboss metal, so long as it is thin.


Pleased with how the 'flower' turned out, I will show you tomorrow step by step how it all was put together.


Ready for the whole thing?? 
This could be an even longer post, if I showed you all the steps of the flower.


A few flowers with Rhinestones and a few others from glitter paper.. and those just add the pretties.

See you tomorrow with the flower post and
Have a Great day getting Crafty!!

Saturday, December 1, 2012

It started with a $1


It started with just $1.00... yes found the wreath at a garage sale for ONE DOLLAR

and a few scraps...


At first I was just going to use the left over fabric and add the tulle behind the flowers,
It wasn't enough.... And yes I forgot to take a picture. Sorry.
 
I had the Angel that I picked up over the garage sale season. She has been hanging in the Kitchen patiently waiting for her proper place.  She was only $1.00.

IMPORTANT NOTE:
I have to say this one took a couple trails... I do NOT adhere ANYTHING until I am happy. Pins for this were a big help. 
Once things were heading in the right direction...the greens were added to frame everything and add a natural element.  I did use a hot glue for this project.  Our Angel is wired on just for extra security. 


Next was our scrap flowers from another project.... the tulle was from the same one.  The flowers did need some Bling... glimmer paper snowflakes to the rescue.


And of course it needs a bow... I just used the same tulle with 6 loops wired the middle and .... 
there you go!


So, I know, I have kept you in suspense long enough....


Thanks for stopping by today... 

Have fun getting Crafty!!