Showing posts with label Itty Bitty Shapes Punch Pack. Show all posts

Saturday, July 19, 2014

July '14


I am excited today... This beauty has new ribbon!! 
Yes, that is the new cotton ribbon.


Using our grid paper and the Stamp-a-ma-jig this "line" stamp is spaced wonderfully.
Yes, that is 'dirtied' on the edges.


The cluster of flowers and sentiment are a great eye catcher, and with them being 'dirtied' too the ribbon stands out even more.
Can you see that the "hello" is slightly curled?? 

Have a Great day getting Crafty!!


Saturday, July 5, 2014

July '14

Another Stamp Camp card today...


Don't you just love this saying and I have to be honest...
I bought A Dozen Thoughts just because of this stamp.  Silly, right?? NO WAY!!
The rest of the set is AMAZING too!

 Yes, this is a slightly off center gate card. 
Our inside has just three flowers decorated with Candy Dots.

The 'just because' side is slightly wider then the Back to Black DSP side.
Yes, that was planned for more room to secure the phrase.


Here is some news!! 
The date for the next Stamp Set Stamp Camp has been set.  What is that you ask?? This is when a stamp set and 5 projects get to all go home with you!!

What is the stamp set you ask?? Gorgeous Grunge.

Here are the basics:
Dates - Sun, Aug 3 or Mon, Aug 4 both at noon central time.
Cost - Wood mount $30, Clear mount $23 or if you have the set already $15. The signup ends on Fri, July 25.  This is so I can have all the stamps here on time!!

Any questions contact me!!

Have a Great day getting Crafty!!


Wednesday, July 2, 2014

It Started with...

Reminder of yesterdays post...
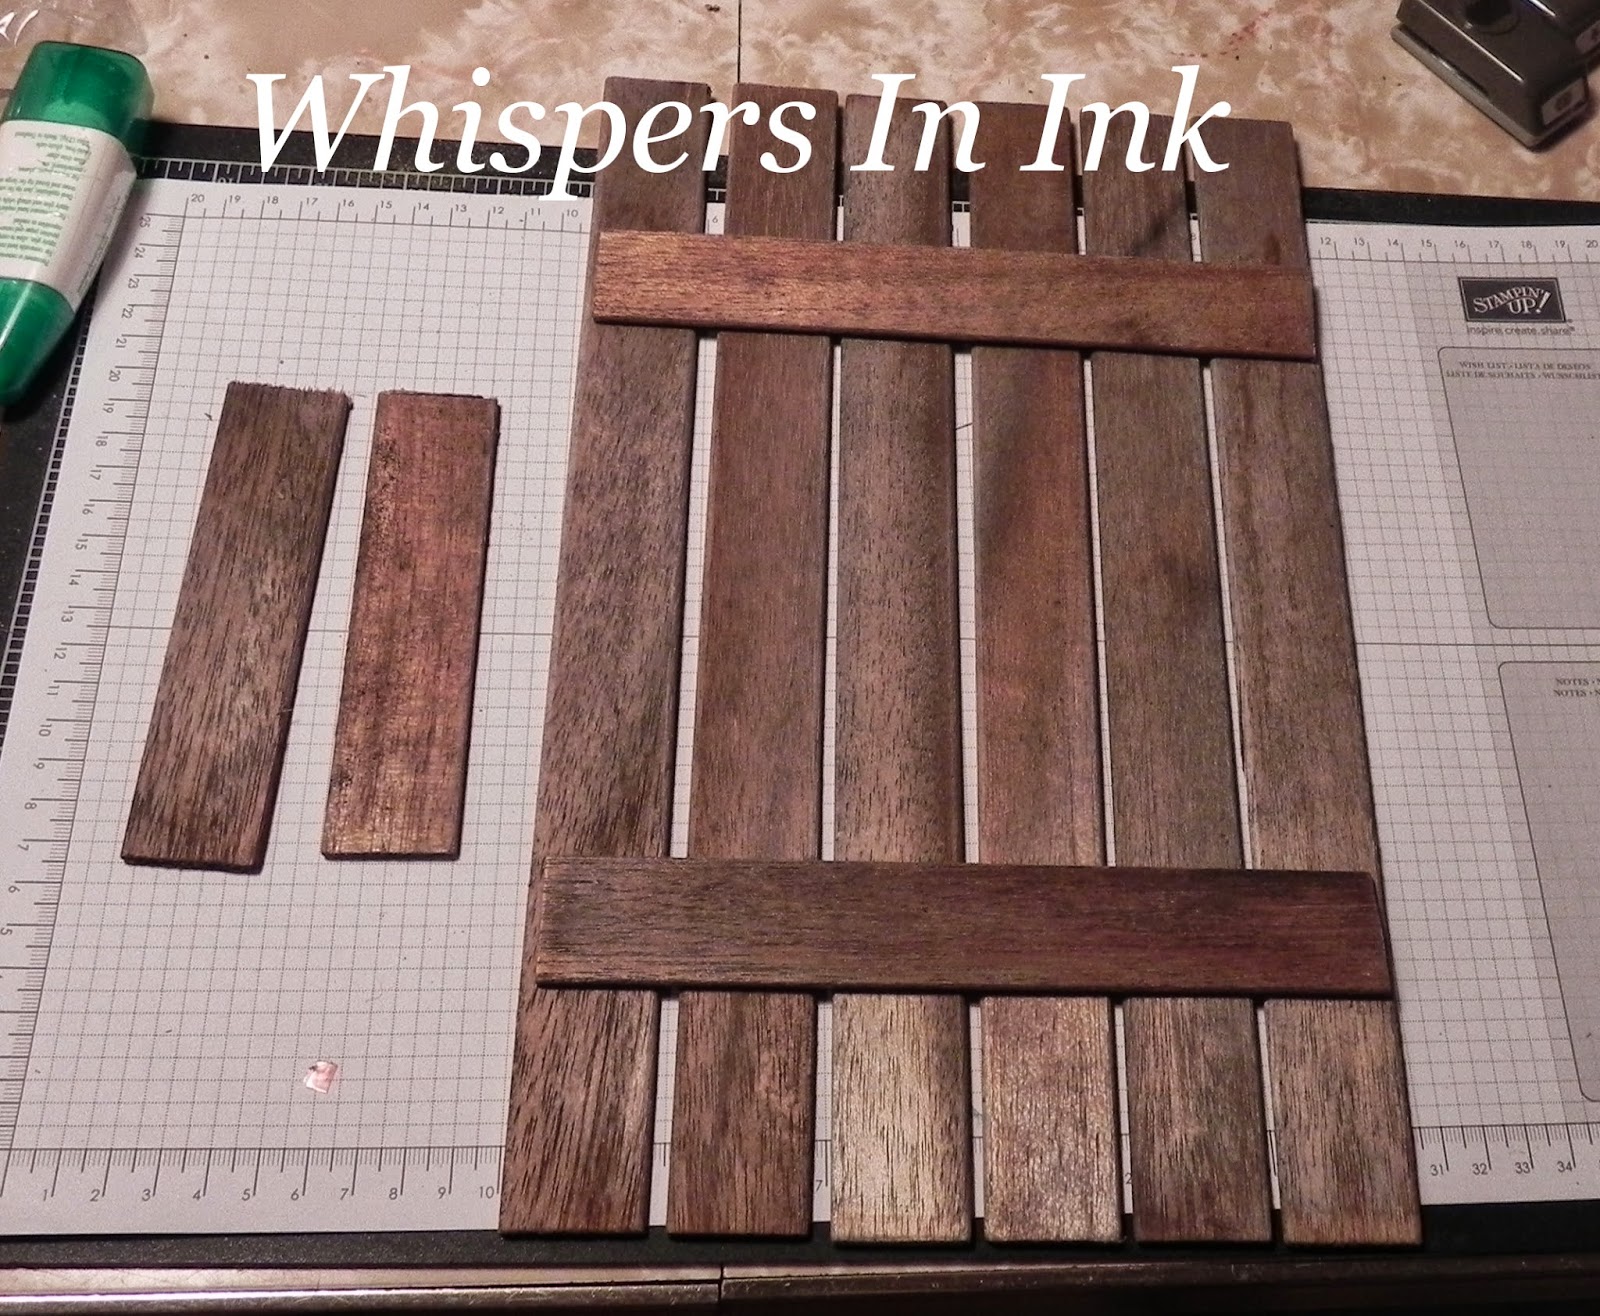
So, what are these you ask... Those are slats from a louvered bifold door.
Yes, I love bifolds for the height they offer. This one actually came apart, I saved the slats knowing that I could come up with SOMETHING to do with them...

While shopping with my wonderful Hubby, we saw this kinda cool picket fence picture holder and this is where I started thinking!! 
You NEVER know where your inspiration will come from.

Here is how it started!!

Using the Tombow Multipurpose Glue, which by the way is not the best adhesive for this project, but all I had at the time... the hot glue gun didn't work either.  Which now you see where my problem came in on yesterday's post.  My Hubby suggested a multipurpose epoxy, but none at the house, doesn't it figure, GEEZZ.
Anyway, all the slats were the same length, using a box cutter it was easy to "trim" the two vertical pieces to the size needed.


 Paper, Ribbon, Linen Thread and half of a Doily.

This Stamp set, Feel Goods, is FULL of amazing phrases. This one is one of my favorites.
Yes, I did "dirty" up the edges of both papers here.


This comes together and just adds, I think, to the rustic look of my 'fence' section.


I am sorry, I forgot that the Bigz Butterfly die retired until I starting putting together my post. 
Really wanting to use the metal, and not sure about punching it out, I left it.  

Decorative Dots Embossing folder is how those polka dots got on there, YES you can emboss metal, so long as it is thin.


Pleased with how the 'flower' turned out, I will show you tomorrow step by step how it all was put together.


Ready for the whole thing?? 
This could be an even longer post, if I showed you all the steps of the flower.


A few flowers with Rhinestones and a few others from glitter paper.. and those just add the pretties.

See you tomorrow with the flower post and
Have a Great day getting Crafty!!

Sunday, June 1, 2014

It Started with.... June


It Started with just...


This wooden frame.... You have seen them, at the local Craft Store!!
How much are they you ask?? Yup, Just $1.00
Jennifer, What can you do with that?? I know you are asking me!


Here is what you will need... One frame. (and there are several different sizes and shapes) Designer Series Paper(DSP) of your choice, Several different adhesives 
(fuse tape, glue dots, tombow glue, hot glue gun too)
and your imagination.

This weekend and next weekend are the local graduations, so graduation it is.
Wanting to do more masculine type projects, here is where that went....


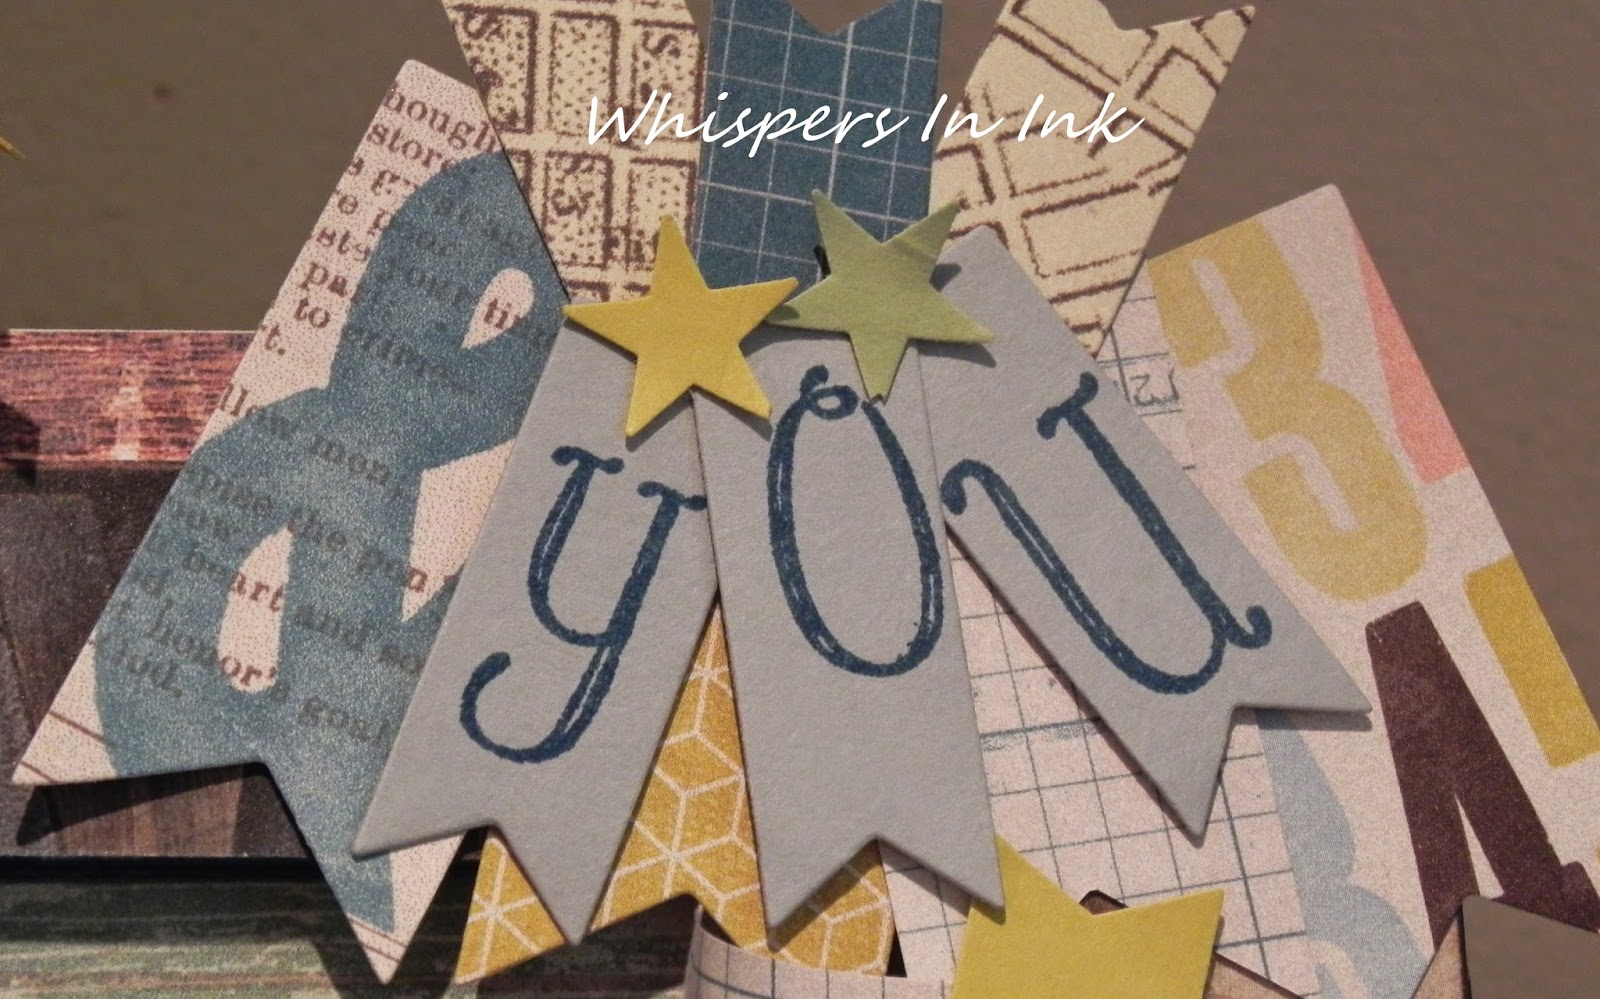
"You did it!!"


using the banner framelits

the new Punch Pack 

retiring Notable Alphabet

retiring Soho Subway DSP(both still available at time of post)


Using mostly DSP and just a splash of 
Pear Pizzazz, retired Summer Starfruit and 
Smoky Slate cardstock.


Bone folder to "curl" the ends.

What do you think of ALL the textures and layers??


I lost count of all the different patterns of DSP.


What to learn from one of my many mistakes! Use your Stamp-a-majig... I do hate that the "t" is off.

Don't know how or what that is... stay tuned this week and I will walk you thru the process.


Do you see the arrow?? yup those are in the new book!! That started today!! WoooHOOO 


This is the first time pulling out the fringe scissors. How fun are these?? And easy too! 
Just a piece of cardstock 2 1/5 by 4, use the scissors on the long end, sticky strip the uncut end, and wind up on a stick (or skewer above) and done.

Have a Great day getting Crafty!!

Monday, May 26, 2014

Today is an important day..
Memorial Day
Today we Honor our Military. This has always been an important day for me but it was made more so when my son became a Marine.  He will always be a Marine and I will always be a Marine Mom!
I am a Proud Mom and am grateful for the sacrifices our Military and He have made for my Freedom!


This says it all... 
I wrote out the 'because of the' but the 'FREEDOM' and the 'BRAVE' are from a retiring stamp set, Words of Courage. 


Using the 'NEW" Itty Bitty Shapes Punch Pack, these stars  are the perfect size.


Curling the 'freedom' and 'brave' so it looks as if they are waving in the wind.


Also, just using a glue dot the stars were left to curl up the edges.


How did the flag look get created...the base is Cherry Cobbler adding 3/4" strips of Whisper White and a section of Midnight Muse for the star section.


Leaving the inside simple with whisper white and midnight muse stars.


Please take the time to Thank a Service member today!
Or write a letter to a Hero, How you ask?? I will be sending a box to OWH, Operation Write Home soon and they are always looking for Hero letters to send.  What is a Hero letter?? This letter goes to a member of the military who does not get any mail from home.  
Contact me for more information.

Have a Great day getting Crafty!!

Tuesday, May 20, 2014

Sketches


Have you ever heard of other card makers using sketches? 
BUT just can not figure out where to begin??

Well, here is my thoughts... from the beginning.


I love OWH sketches, there is a new one every week, they come out on Sunday.
I donate all my unused cards to them, for the soldiers. I have a badge on my sidebar.
Anyway, So, the first thing I do is pick a theme.  
Continuing with my graduation theme from the weekend.

Then, I look at the shapes on the sketch, NO you do not have to be exact.  
I like the three "strips" here the first thing I thought of was ribbon. 
Now, what can I do with the rectangles....HUMM??   Again, the first thing that popped into my head was Apothecary accents, the long piece.

Now into the craft room I went.  
Picking colors, ribbon and of course little pretties too.
Ohhhh the juices are flowing now... The sentiment was easy, I have been looking for a reason to use this one:


Here is my version.. can you see the sketch??


The new In Color ribbon became my "strips".

and the sentiment fit perfectly in the 6th from the smallest circle framelit.


The inside was just left simple with three new punch flower from the new Itty Bitty Shapes Punch Pack.
 
Mossy Meadow, Hello Honey and Blackberry Bliss look just amazing together.


 I do hope that this little step by step helped.  Any questions just email me.  I will do my best to help!
Have a Great day getting Crafty!!

Sunday, May 11, 2014

Happy Mother's Day


Today is a day we thank our Mother's for all they have done for us.  All the sacrifices, the tears and hard work they have gone through to bring us were we are today!!

I am sad today, because I can not go see my Mom or my Son.
Well, my poor car finally decided that over 200,000 miles was just enough.  So to find a "new to me" car, the saga begins.  I really HATE car shopping!! 
Anyway.... back to our female role model that taught us what to do and not to do to get through each day.... And bring us to where we are today.

Can you see it??
Here is a closer picture..


using the new Fancy Foil Designer Vellum you are able to create a "window" to see the inside.


Happy Mother's Day, Ladies!!


Using the gold bakers twine you can actually "pull" out the gold and it looks like thread.

Note the notches on the sides to hold the twine in place.


This card is definitely one you can mail.


Dontcha, just love the little gold hearts??


I know this looks like the one from stamp camp, right??  To be honest I received a store bought card for my birthday and it had a vellum overlay.  This is what inspired this card.


Yes, I did, using the new Heart punch from the itty bitty pack.  That acts as a way to open the front.

Using the hearts from the My Mother set to add a design to the background.


Mom, I love you!! 
I hope everyone is treated like 1 in a million today!!

Have a Great day getting Crafty!!
Ohh wait, I almost forgot!
Blog Candy Winner:
   Here are the entries....

And the winner is.....


Congrats, Rebbecca!! 

Wednesday, May 7, 2014

May Stamp Camp

Flowers and Folds Stamp Camp
day 4

Here is how things started after Lunch


You know I had to use my FAVORITE punch!! The Petite Petal Punch!!
Do you see our NEW flower?? Isn't it cute??
That is part of the NEW Itty Bitty Punch pack.


Here is the Chevron Punch doubled up!! Before you punch, stamp using the Hardwood stamp.  That is what added the wood look.  Add some branches from the Bird Punch and even a wing as a leaf.  


I know you are getting upset because you want to see the whole thing, this one is my favorite so a little teasing is only in my nature. 


You will need dimensionals, so you can put the leaves and even the flowers under/ around the "trellis" or section of lattice. 


Have you picked which one is your favorite so far??


 It was just too pretty to put anything else.  
The Daffodil Delight and Tangerine Tango are Watercolor Wonder DSP.  
The Real Red and Perfect Plum are cardstock stamped, then punched out.

Have a Great day getting Crafty!!

Sunday, May 4, 2014

May Stamp Camp


Ever wonder what you do at a stamp camp??
For the next 6 days you will find out what cards we did for the 

Flowers and Folds Stamp Camp.

This card is the one that you were given the tease of a few weeks ago.


Well here is the whole picture!!


Pretty dontcha think??
 I will miss the Itty Bitty Punch Pack! I use it all the time.
However, the new Itty Bitty is Super Cute.


So, here is the deal, 
BLOG CANDY!! 
yup, blog candy, here is what you need to do to WIN!!

1. comment on your favorite card outta of the 6.
2. like Whispers In Ink on Facebook
3. Share your favorite card on Facebook.


The winner will be chosen on Sunday morning.  


What will you win??  
You will have to wait until tomorrow to find out what the 

BLOG CANDY

is going to be.

Have a Great Day being Crafty!!